Phone Metadata (Phone to Desktop)
Summary
Open Phone Metadata on your phone. Pick a reference photo from your library. Tap Send To Desktop. The phone shows a 6-character code. Type that code into the desktop window. Your desktop now has the phone photo's GPS, capture time, and IPTC fields (the captions-and-credits block: city, headline, caption, keywords, copyright, and more), ready to apply to your selected photos or save as a Location Preset.
Previously called Metadata Bridge
The feature kept its short URL (/metadata-bridge), but the
on-screen name and the docs changed to Phone Metadata on
2026-05-19. Old bookmarks and QR codes still work.
-
What rides across
The photo's GPS, capture time, and IPTC block (city, headline, caption, copyright, keywords, and more).
-
6-character code
Easy to read, hard to mistype. The code skips look-alike characters like
0,O,1,I, andL. -
Self-destructs
The code expires after 24 hours, or the second the desktop picks it up. Whichever comes first.
-
Up to 24 photos per send
Each send carries up to 2 MB. The phone trims thumbnails if it has to.
Phone Metadata is different from the
Mobile GPS Logger. The Logger records your whole
route as a .gpx track. Use it when you need GPS on every photo
from a long day. Phone Metadata handles a handful of specific
spots. Pick one phone photo per location, send the batch, apply it
to the matching desktop photos.
When to use Phone Metadata
- You shot phone photos at the same spots as your camera, and you want that GPS on the desktop versions.
- You walked through a venue or a few key spots and want one reference per location instead of a full track.
- You want the phone photo's IPTC fields (city, headline, captions, copyright, keywords) carried straight onto the desktop photos.
- You want to save a Location Preset for a place you visited on your phone, without typing coordinates.
- A multi-hour hike, wedding circuit, or city walk where every photo needs its own GPS point.
- You want a
.gpxfile you can drop into other GPS-aware tools. - You don't have stand-in phone photos at every spot, just a continuous path.
See the Mobile GPS Logger for that flow.
How the flow works
Three places, one short relay:
-
On your phone
Pick a reference photo. Phone Metadata reads its GPS, capture time, and IPTC fields, builds a waypoint, and uploads the batch.
-
In a short-lived cloud slot
The slot mints a 6-character code, holds the batch for up to 24 hours, and deletes it the first time anyone picks it up.
-
On your desktop
Scan the phone's QR with your webcam, type the code, or let the hands-free pickup grab it. Then Apply To Selection or Save As Preset.
Opening Phone Metadata on your phone
You can open the desktop modal in three places. All three land on the same screen.
Click the phone icon in the desktop header, next to the Logger button. Fastest path. Opens in Apply mode.
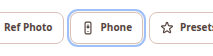
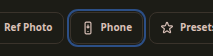
On the Location panel, click the Phone button next to Ref Photo. Opens in Apply mode against whatever photos you have selected in the gallery.
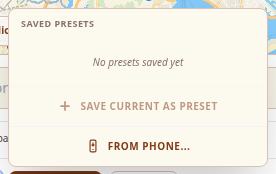
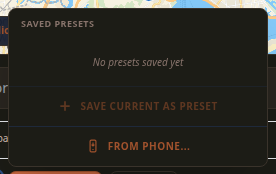
Click Presets on the Location toolbar, then From phone... at the bottom of the dropdown. Opens with Save As Preset as the main action.


Old QR codes still work
Phone Metadata lives at /app.html?mode=bridge. Older URLs
(?mode=metadata and ?mode=logger&capture=photo) still open the
same screen, so any QR code you shared earlier still works.
On your phone
The phone screen does one thing: pick a reference photo from your library and send its data. It does not record live GPS. For that, use the Logger.
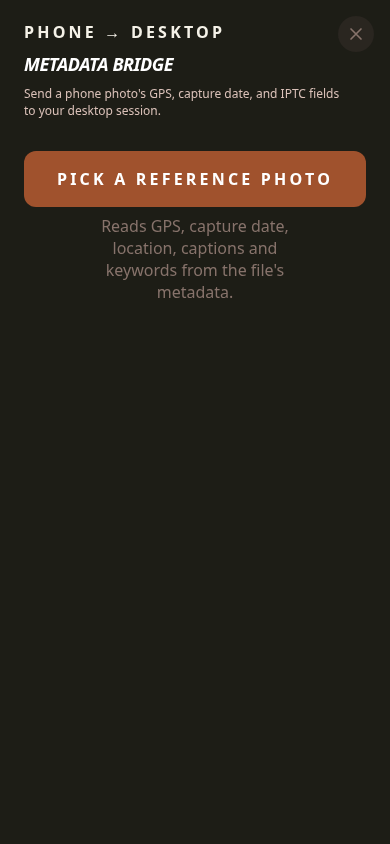
Pick A Reference Photo
Tap Pick A Reference Photo. The photo picker opens. Pick any image. Phone Metadata reads three things from it:
-
Location
Latitude, longitude, altitude, and heading, when the photo has them.
-
Capture time
When you took the photo (the same value your camera stamps on the file).
-
IPTC fields
City, state, country, country code, sub-location, description, headline, credit, source, instructions, copyright, artist (creator), usage terms, title, and keywords.
What about scene code and subject codes?
The transfer can carry both fields, but the phone screen does not read them from a library pick today. They show up in the desktop Customize Fields panel only if the source got them another way (for example, a preset round-trip).
Every pick lands in the Captured strip as a small thumbnail with an IPTC badge. You can pick up to 24 photos per send.
No GPS in the photo? Phone Metadata still helps.
If the picked photo carries IPTC but no GPS, Phone Metadata asks the phone for a one-time location fix and pins that to the waypoint. The IPTC fields come along either way. Just allow location once when the browser asks.
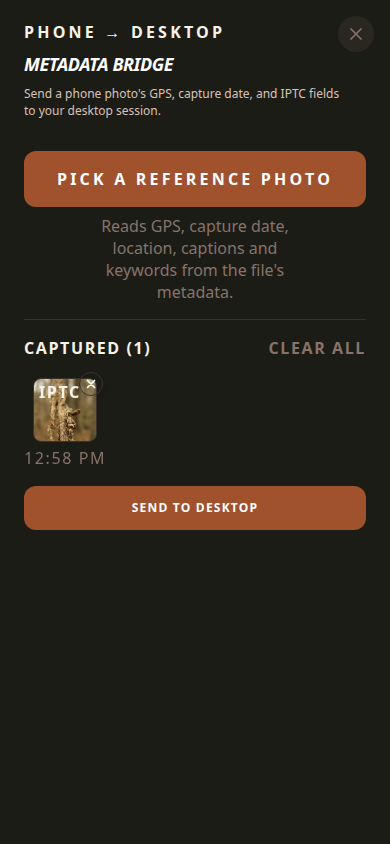
Send To Desktop
Tap Send To Desktop. The phone uploads the batch and flips to the Transfer Code Display, ready for handoff.
Send size limit
Each send can hold up to 2 MB. The phone shrinks thumbnails once it gets close to that ceiling. If the batch still won't fit, Phone Metadata shows an error. Remove a few captures and try again.
How the phone shrinks thumbnails
- Phone Metadata resizes every pick to a max of 256 pixels at moderate JPEG quality. That's about 30 to 80 KB per thumbnail.
- Before sending, it checks the total size. If the batch is under 1.8 MB, it sends as-is.
- If the batch is too big, it re-saves every thumbnail at lower quality. It tries twice (50% quality, then 30%).
- If the batch is still too big, you see a "Payload too large" error and need to remove captures. With thumbnails on, plan for about 6 captures per send. Without thumbnails, many more.
Transfer Code Display
The Send screen flips to a calm "Sent" view: a green check, a scannable
QR code, and the 6-character code in big monospace type. Either path
works for the desktop. Scan the QR with your laptop webcam, or read the
code and type it in. The dash in ABC-DEF is for your eyes only; the
desktop accepts the code with or without it.
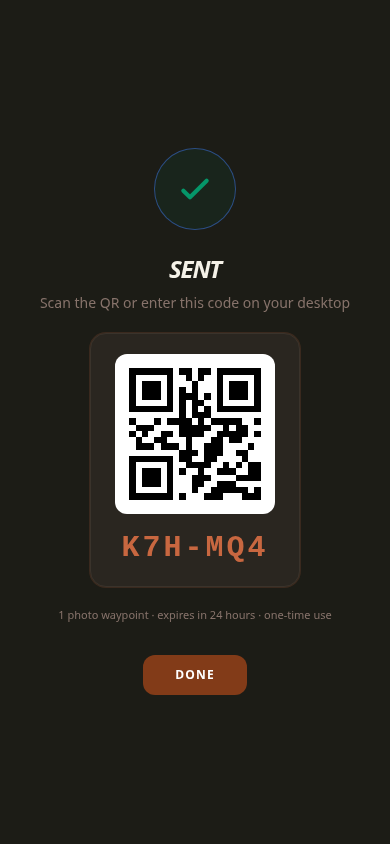
Tap Done by accident before the desktop has the code? The Recovery banner section below explains how to bring it back.
Recovery banner
Closed the code screen before the desktop entered it? Next time you open Phone Metadata on the phone, a Last Sent Code banner appears at the top. It shows the saved code, how many waypoints it holds, and how long it has left. Tap Show to bring the full-screen code back, or Forget to wipe it. The banner clears itself after 24 hours, or after the desktop picks up the batch.
On the desktop
Once the phone has a code, you can hand it off in three ways.
Click Open Camera under Scan Phone QR. The webcam reads the QR code from the phone screen. Fastest path if your phone is already pointed at the laptop.


Type the 6 characters into Enter Code and click Import. The dash drops in for you between characters 3 and 4. Case doesn't matter. Press Enter if you'd rather skip the mouse.


If you opened Phone Metadata by scanning the desktop's QR code, and the desktop modal is still open when you tap Send, the desktop pulls the batch on its own. No typing. The desktop watches for 60 seconds after the modal opens. After that, scan or type.
Once a batch lands, the modal switches to the Loaded view: the list of waypoints, a Camera-Clock Offset control, and the action buttons.


Camera-Clock Offset
If your camera's clock is set wrong, the waypoint times won't line up with your photo times. The Camera-Clock Offset shifts the waypoint times forward or backward so the match works.
When you have a photo selected as the batch arrives, the modal compares that photo's capture time to the nearest waypoint and offers a Use ±N chip. One click fills the offset for you.


The offset box accepts a few formats:
| Input | What it does |
|---|---|
+1m 30s |
Pushes waypoints forward 90 seconds. |
-45s |
Pulls waypoints back 45 seconds. |
00:01:30 |
Hours, minutes, seconds. Signed +/- works. |
2h 15m |
Mix and match h, m, s parts. |
0s or blank |
No offset. |
Apply To Selection
Select one or more photos in the gallery, then click Apply To Selection. How the modal picks a waypoint for each photo depends on the batch size.


The waypoint applies to every selected photo. Useful when the phone capture stands in for a whole batch.
The modal pairs each selected photo with its closest waypoint by capture time (with the offset applied). The Apply Preview strip shows the matches. A summary line reads "Will tag X / Y will overwrite existing GPS / Z can't be matched". Don't like a match? Pick a different waypoint for any photo by hand.
Customize Fields
When the batch carries IPTC data, a Customize Fields section appears above the Apply Preview. Every field starts checked. Uncheck any field you don't want written. GPS is never optional. It's the point of Phone Metadata.


Checked still means fill-empty, not overwrite
A checked field writes only when the destination photo's field is empty. Phone Metadata never overwrites a value you already typed. Keywords and subject codes are the exception. They add new entries to the existing list.
The fields, in the order they show up in the panel:
| # | Field | Source EXIF / IPTC / XMP tag | Write rule |
|---|---|---|---|
| 1 | Capture date | DateTimeOriginal |
Fill empty |
| 2 | City | IPTC City |
Fill empty |
| 3 | State / Region | IPTC Province-State |
Fill empty |
| 4 | Country | IPTC Country-PrimaryLocationName |
Fill empty |
| 5 | Country code | IPTC Country-PrimaryLocationCode |
Fill empty |
| 6 | Sub-location | IPTC Sub-location |
Fill empty |
| 7 | Description / caption | IPTC Caption-Abstract |
Fill empty |
| 8 | Headline | IPTC Headline |
Fill empty |
| 9 | Credit | IPTC Credit |
Fill empty |
| 10 | Source | IPTC Source |
Fill empty |
| 11 | Special instructions | IPTC Special-Instructions |
Fill empty |
| 12 | Copyright | IPTC Copyright Notice |
Fill empty |
| 13 | Creator / artist | IPTC By-line |
Fill empty |
| 14 | Usage terms | XMP xmpRights:UsageTerms |
Fill empty |
| 15 | Title | IPTC ObjectName / XMP dc:title |
Fill empty |
| 16 | Scene code | IPTC SceneCode |
Fill empty |
| 17 | Keywords | IPTC Keywords |
Adds to list |
| 18 | Subject codes | IPTC SubjectCode |
Adds to list |
Save As Preset
Click Save As Preset to save the first waypoint to your Location Presets. The preset name defaults to the place name the geocoder picks. If a preset of that name already exists, the modal gives you three choices.
-
Overwrite
Replaces the existing preset with the new waypoint. Use this when you're updating a familiar spot.
-
Save As
Saves under a numbered name (for example,
Bartholomew Trail (2)). Use this when the names happen to collide but the spots are different. -
Cancel
Leaves both presets alone. Nothing changes.
Want to save a different waypoint instead of the first one? Delete the leading captures on the phone before you send.
Presets carry IPTC too
If the first waypoint has IPTC fields, the preset saves them as a template. Re-applying that preset later writes both the GPS and the IPTC block. Presets don't show a Customize Fields panel, but they follow the same fill-empty rule (existing values stay; keywords and subject codes add to the list).
After Apply
When the Apply finishes, the modal swaps to a success card with the result. Click Done to close the modal; the photos in the gallery are already updated.


Move your whole workspace to another computer
Phone Metadata moves a single shoot's location and IPTC data across. Sometimes you want to move the whole workspace too: every IPTC preset you have set up, every keyword group, every rename pattern, every pinned location, your default toggles. The bottom of the Phone Metadata window has an Export and Import button for exactly that.
-
Export
Save your presets and settings to a single
.jadeworkspacefile. Put it on a USB stick, AirDrop it, email it to yourself, or drop it in Dropbox or iCloud Drive. The file is plain text, so you can open it in any text editor and skim the contents. -
Import
Pick the
.jadeworkspacefile on the other computer. Jade GT merges it with what you already have. New items get added. Items that match something you already have (a preset you renamed, for example) take the version from the file you just imported.
What rides along:
- IPTC presets and your default preset
- Keyword synonyms (the "K9 means Dog" pairs from the Tags tab)
- Rename patterns
- Pinned locations
- Mobile GPS Logger preferences
- Saving strategy and No AI Training toggle
What does not ride along:
- Photos themselves. Use AirDrop, a USB stick, or your normal delivery workflow for those.
- Your subscription, billing data, or daily usage counters. Those are tied to your account on each device.
- The active GPX trail or the photos loaded in the current session. Those are scoped to one shoot, not your whole workspace.
No cloud, no account
The handoff file never leaves your computer until you move it. Jade GT has no idea you exported. No backend, no tracking of the contents. The whole point is that a working photographer can keep their bench setup portable without trusting another vendor.
Same file, every browser
A .jadeworkspace file made in Chrome on Mac imports cleanly
into Edge on Windows or Firefox on Linux. The file is plain
text. The .jadeworkspace extension is for your sanity, not a
Jade GT lock.
Move a whole session to another computer
A .jadesession file is the parallel format for the shoot you are
currently working on. Where .jadeworkspace carries your bench
setup, .jadesession carries your decisions: picks, captions,
ratings, and coverage state. Two photographers on the same wedding can ship a session back
and forth so neither has to redo the other's culling pass.
-
Save
Press Cmd+K and pick Save session to a .jadesession file. Jade GT writes a single
.jadesessionfile with the date in the name. The raw photos are NOT in the file. The other computer needs the same source folder. -
Open
On the other computer, load the same photos first. Then Cmd+K and pick Open a .jadesession file. Confirm the prompt and Jade GT replaces the current picks and coverage state with the contents of the file.
| What rides along | What does not |
|---|---|
| Pick / Maybe / Reject, color labels, ratings | The photos themselves (the file stays small) |
| Editable IPTC fields (description, headline, keywords) | Your .jadeworkspace presets and synonyms |
| Stack groupings, perceptual hashes, sharpness signals | Subscription, account, daily usage counters |
| Coverage segment labels and the shot-list checklist | Live Pair connection state |
Jade GT matches photos by filename, size, and modified date
Jade GT fingerprints each photo on its name, size, and last- modified time, so it reconnects the session's decisions to the right local file even when the two computers use different internal labels. The success toast tells you how many photos matched and how many entries did not find a home.
Open a session is a replace, not a merge
The importer clobbers your current picks and coverage state. It runs after a single confirm prompt with no undo. If you want to keep what you have, export your own session first as a snapshot.
Live Pair (over the local network)
Saving a .jadeworkspace file works for big moves on a USB stick,
but when two computers are on the same Wi-Fi (your laptop and your
phone, or your shooting laptop and your editing rig) you can pair
them directly and skip the file step. Click Live Pair in the
Phone Metadata footer, or run the Live pair with another device
command from the Command Palette (Cmd+K).
-
Send
Click Send to show a short code and a QR. The other device scans the QR (or types the code) to join. Once paired, your whole Workspace pushes across.
-
Receive
Click Receive and type the 6-character code from the other device. The two devices open a direct connection and the incoming batch applies automatically. A toast tells you what you received.
What rides along:
- Your workspace (presets, keyword groups, rename patterns, pinned locations, default toggles).
What stays put:
- Photos. Use AirDrop, a folder share, or your normal delivery workflow for the actual files.
- Your subscription, billing, or daily usage counters.
How the connection works
The two devices trade a one-time handshake through a short cloud slot (the same 5-minute relay Phone Metadata uses). Once connected, the data flows directly between the two devices over the network. Jade GT's servers never see your presets or your workspace.
Same network for best results
Live Pair works best when both devices share the same Wi-Fi. Pairs across networks work too when the networks allow it, but a corporate firewall or a strict VPN can block the direct connection. If pairing times out, both devices fall back to the Export / Import file flow.
Privacy and lifetime
Every transfer runs through a short-lived cloud slot with two hard rules.
-
24-hour expiry
A code that nobody picks up vanishes after 24 hours. No second chance, no archive copy.
-
Pick up once
The first successful pickup deletes the batch. Try the code again and you'll see "expired or not found". Make a new code.
About the code alphabet
Each code uses 6 characters from this set:
ABCDEFGHJKLMNPQRSTUVWXYZ23456789. The missing characters
(0, O, 1, I, L) look too much alike when you read a
code off a phone screen across the room.
Thumbnails and the local cache
The transfer holds each thumbnail as a small JPEG inside the batch. They vanish with the rest of the batch on pickup. The phone keeps the last sent code (not the photos) in browser storage so you can show it again from the recovery banner. That storage also clears on the same 24-hour clock, and Forget wipes it on demand.
Troubleshooting
\"Payload too large\" after Send
The batch passed 2 MB even after Phone Metadata shrank the thumbnails. Remove a few captures (tap the X on a thumbnail) and try Send again. Or pick photos with smaller embedded previews.
\"Transfer expired or not found\" on the desktop
The code already got picked up once, or it's older than 24 hours. Go back to the phone and tap Send again to mint a fresh code.
Hands-free pickup didn't fire
The desktop watches for 60 seconds after the window opens. If you waited longer than that before sending from the phone, the watcher stopped. Type the code or scan the phone's QR with the webcam.
The photo has no GPS and you blocked the location prompt
Phone Metadata needs either GPS in the photo or a live fix from the phone to build a waypoint. If you blocked location, Phone Metadata can't finish the pick. Allow location for the site in your browser settings and pick again.
Related guides
-
Phone Metadata + Apply To Selection
The fastest way to backfill GPS on a small batch (1 to 10 photos) when you walked the locations on your phone.
-
Phone Metadata + Save As Preset
The fastest way to save a recurring location (a regular studio, a favorite shoot spot) without typing coordinates. The IPTC fields come along.
-
Logger + GPX matching
The right tool for a continuous track (a long walk, a hike, an all-day event). See the Mobile GPS Logger and the Location tab's GPX sync.